How to Set Up Your CleverTap Integration in Apptrove?
If you are interested in mobile marketing but haven’t used any type of tracking method, it can create a lot of frustration because you may not know where the traffic that you generate is coming from. You are aware of apps being downloaded and of your advertising campaigns or promotions, but don’t know specifically where the best users are coming from. You also don’t know which advertising campaign is, in fact, getting you the most engaged users (i.e., actual users who utilise your app rather than just the users that downloaded your app).
Fortunately, CleverTap‘s integration with Apptrove now solves this challenge.
Through the integration of CleverTap with Apptrove, you can combine and synchronise all app install, app events, and app attribution data into one unified workflow. The result of this integration is a more insightful view of each campaign’s effectiveness, improved user engagement tracking, improved user retention measurement, and a better understanding of the overall user journey through the app.
In this how-to guide, we will provide you with all the steps necessary to complete the full setup process of the CleverTap Integration through the Apptrove application.
CleverTap Integration Configuration Steps in Apptrove:
For an Apptrove customer to configure their CleverTap integration correctly, please follow the steps below:
Step 1: Access the Partner Integration Directory
Log on to the Apptrove dashboard; from there and from the main dashboard:
- Select Partner Integrations
- Open the Directory
This area shows you all possible partner integrations that Apptrove supports; think of this area as a behind-the-scenes behind your marketing tools shaking hands and operating together, while the campaigns themselves take centre stage.
Step 2: Search for CleverTap
Integrate CleverTap within the Integration Directory:
- Locate CleverTap and Select the CleverTap Integration Setup Page.
You will be presented with the configuration page, where you need to include various required details.
Step 3: Enter Your CleverTap Credentials
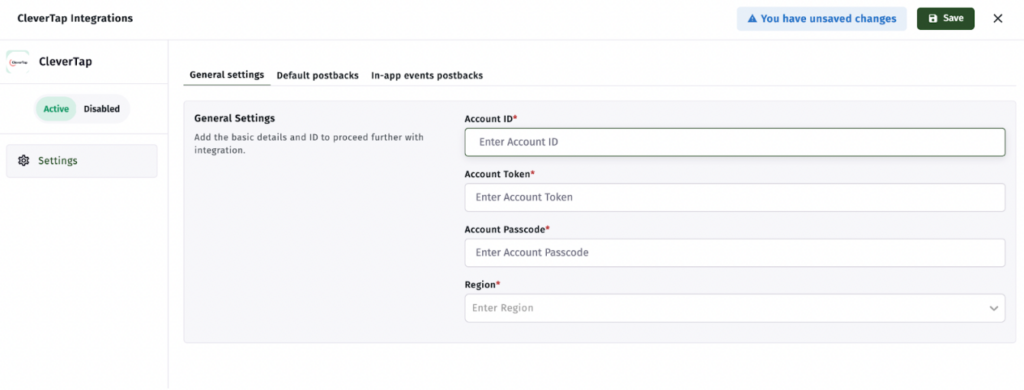
The most crucial part of setting up the CleverTap integration is entering your CleverTap credentials; you will need the following:
- CleverTap Project ID
- Unique identifier for your CleverTap project.
- CleverTap Project Token
- Token that authenticates your CleverTap project.
- CleverTap Password
- Credentials used for verification to access your CleverTap account.
- Region
- Select the corresponding CleverTap region associated with your account.

It’s essential to validate every detail entered very carefully because just one incorrectly entered character will cause data to be unsynchronised between the various platforms.
Step 4: Enable Default Postbacks
After successfully entering your credentials, the next step is to enable postbacks.
Default Postbacks automatically send attribution information from Apptrove to CleverTap (for example: install attribution data, campaign-level information, and user acquisition information).
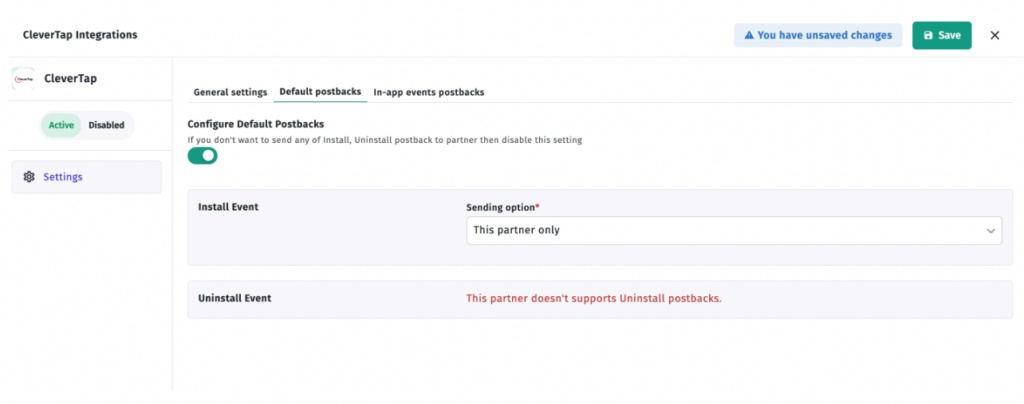
To enable default postbacks, please do the following:
1. Toggle ON the Default Postback
2. Click Save
This enables CleverTap to receive install attribution events from Apptrove. Without postbacks, your campaigns are basically whispering into the void.
Step 5: Configure In-App Event Postbacks
This is where CleverTap integration gets even stronger.
Apptrove can send in-app events to CleverTap for deeper analytics of engagement.
Option 1: Send All Events
You can choose to automatically send all tracked events that occur in your app.
This is helpful if you want an accurate view of all user behavior without having to manually configure each event separately.
Examples of this include:
– app open
– purchase
– registration
– level completed
– subscription event
Option 2: Manually Map Events
If you want cleaner reporting and to focus your reporting, you can manually map specific events for reporting purposes.
This gives you greater control over which events are sent and, thus, how to optimise campaigns by using event-level optimisation. For example, instead of sending every interaction that happens inside your app, you may choose to send only purchases, registrations, and subscription renewals.
Save the Integration Settings
After configuring your Integration settings (credentials, default postbacks, and event postbacks), click save. Your CleverTap Integration is now complete; Apptrove will automatically send attribution and event data into CleverTap after the Integration is enabled.
Why Use CleverTap Integration With Apptrove?
Let’s first discuss the benefits of this integration before going to the setup.
A successful CleverTap integration can help marketers:
- track inorganic installs accurately
- Sending attribution info into CleverTap in real-time
- Synchronising in-app events across the two platforms
- Understanding how well campaigns are driving both engagement & retention
- Creating stronger lifecycle as well as retargeting strategies
Now, instead of two separate analytic systems, the two merged platforms utilise a common language to report data. That is to say, both acquisition and engagement data are finally located & reported together.
Prerequisites for Setting Up CleverTap Integration
Ensure you have the following credentials before starting your CleverTap integration:
- Your Apptrove dashboard account
- CleverTap user credentials
- Project ID
- Project Token
- CleverTap Account Password
- Region Specific info (where the CleverTap account was created)
These credentials will enable both systems to authenticate and sync data between them.
Configure In-App Event Postbacks
This is where CleverTap integration gets even stronger.
Apptrove can send in-app events to CleverTap for deeper analytics of engagement.
Option 1: Send All Events
You can choose to automatically send all tracked events that occur in your app.
This is helpful if you want an accurate view of all user behavior without having to manually configure each event separately.
Examples of this include:
– app open
– purchase
– registration
– level completed
– subscription event
Option 2: Manually Map Events
If you want cleaner reporting and to focus your reporting, you can manually map specific events for reporting purposes.
This gives you greater control over which events are sent and, thus, how to optimise campaigns by using event-level optimisation. For example, instead of sending every interaction that happens inside your app, you may choose to send only purchases, registrations, and subscription renewals.
Save the Integration Settings
After configuring your Integration settings (credentials, default postbacks, and event postbacks), click save. Your CleverTap Integration is now complete; Apptrove will automatically send attribution and event data into CleverTap after the Integration is enabled.
What Data Gets Shared Between Apptrove and CleverTap?
CleverTap integration allows marketers to see how effective their app marketing is once a user has installed an app. Marketers will be able to track users’ journeys from install to deep engagement.
By utilising this single source of truth for integrating CleverTap, marketers can easily see how their mobile marketing campaigns are performing. By having all data (install and in-app) in one place, marketers will be able to clearly see how different marketing channels and partners perform in acquiring and engaging users through their campaigns.
Conclusion
Marketers should be able to see much more clearly how well they convert users. CleverTap and Apptrove provide a streamlined process for users to gain insights through both attribution and engagement analytics without having to use multiple dashboards and fragmented insights.
By establishing this link between attribution and engagement analytics through CleverTap, app marketers will have a clearer idea of how to develop their campaigns. By establishing their integrated CleverTap and Apptrove campaigns, marketers will know how to best optimise their app marketing by better understanding which parts of their marketing drove higher engagement or conversions after the app was installed.
from Apptrove https://apptrove.com/how-to-set-up-your-clevertap-integration-in-apptrove/
via Apptrove


Comments
Post a Comment